
Hi all.
Sorry that I haven't managed this blog.
It's been long time to post a new thing here.
Today, I wannna share my DIY 4k beamer.
The original post is on my Korean blog (http://blog.naver.com/bumhee34/220859616533).
Here, 4k means "3840x2160" resolution (2160p).
At the time being, commercial "real 4k" beamers are only made by Sony, and the price starts at 9,999 USD.
There is another type called the e-shift technology, but it is not physically 4k.
Anyway, the 4k beamers are too expensive for me, and I like to make something new by myself.
Therefore, I've started this little project.
As I've done many experiments with various lens, I've spent so much of money.
Luckly, you could make this 4k beamer at around 1,000 USD if you buy final materials confirmed to work well.
For DIY guys, I attach the AutoCAD files. (download link)
As this post is quite long, I show you the final results first.
Video clips are at the end of this post.
The side view.
I've engraved(?) Pikachu and Red for fun.

Looking close. Used colored arcryl parts.

I made two switches, I can turn on LED and cooling fans (+LCD) separately.

The front view.

The other side, there is a small pikachu.

This little one was engraved by laser marking, and the knob below controlls the LED brightness.

I have four HDMI ports, but I will use the HDMI 2.0 port only.

I took the pictures of 4k images.
I almost cried as the high image resolution touched my heart.
BUT, my cell phone camera sucks, so you may not feel the same.


Let me get started the long build log.
It's been around one year since I had a plan to make a 4k beamer.
At first time, I tried to use 15.4 inch 4k LCD as there are several taobao sellers selling 4k boards to drive the LCDs.
However, there are many obstacles in the usage of 15.4" LCDs.
- Poor driving board : In taobao.com, several sellers sell the boards. To be straight, all the boards are garbages. It uses DP cables, and the length is limited. In addition, it works only with some specific VGAs. Actually, I bought it and tested. No worth to use it.
- Size limitation : if you go for 15.4"... the size will be huge. Also the throwing distance would be limited.
- Lens limitation : the lens combination to be used with 15.4" LCD is limited. Not so many choices.. If you have problems, you will have the problem forever as there are no alternative materials.
So.. I couldn't start this project due to above reasons.
Finally, I could get 10.1" 4k LCD with a proper driving board around 2 months ago.
I tested many lenses, so it took me a long time to finalize this project.
But the painful experiments were worthy to make a so-satisfactory 4k beamer.
The final combination of lenses and the shop you can buy are listed as follows
- Fresnel lens : both back/front fresnel lenses are F220 and 0.3mm groove pitch. (http://www.fresnelfactory.com/ or from aliexpress), I use fresnel lens from fresnelfactory. Both lens have similar quality.
- Projection lens : F260 (from taobao), around 178 yuan.
- Condenser lens : square-round shape condenser (from aliexpress), 26$
- LED light engine and proper constant current driver : (from taobao), around 1000 yuan. You must talk to the seller that you want to buy a 200 watt LED (engraved SSD-90. it is not SSD-90 actually, but modified version) with a CC driver. He can speak understandable English.
- Heatpipe for LED cooling : you have many choices. anyway I bought it from taobao. It is temporarily out of stock, but you can buy similar things. Search @ aliexpress.com.
- Power supply for LED : 240W SMPS from aliexpress, 17.10$
- Power supply for fan and LCD driver : 60W SMPS from aliexpress, , 6.30$
- LCD and LCD board : 10.1" 4k LCD (model no. : TVTV101QUM-N00], contact Daniel Lee from APTus. The total price was around 250$ excluding shipping cost. I was told that they are not willing to produce more boards as there are not enough demands. But I think they will produce it again if many guys try to make contact with Daniel Lee. Tell him that Bumhee Cho introduced him to you.
- HDCP 2.2 bypass tool : this is an important part. If you want to enjoy 4k contents, then you should bypass HDCP 2.2 compliant. There are many UHD TVs but non HDCP 2.2 compliant. Luckly, there are tools for this kind of TVs to bypass HDCP 2.2 compliant. Some HDMI splitter or some bypass tools will work. In my case, I bought HDFury Integral. It is little bit over-priced, but looks cool and sturdy. And the integral is confirmed to work with my board and Shield TV very well.
- You may want this : Shield TV, to enjoy Netflix in 4k (Ultra HD), I bought it.
- ETC : Buy minor things depending on your taste. AND prepare your fancy hands.
The DIY 4k beamer has pros and cons as follows:
- Advantage : you can enjoy 4k contents. The image quality is really really super nice.
- Disadvantage : The main disadvantage of a DIY beamer is poor brightness, but it is very nice under dark environment. The poor brightness can be enhanced by Fly Eye Lens, PBS, and ETC. (Thx to Ryan Smit for this kind of info) But this will take me another jump on cost and time.
Anyway, looking at the brief summary on main material sources, it may seem that the tour of build was easy and straightforward.
To be honest, it was sooooooo painful as I did so many tests.
Ok. Let's get started opening boxes first.
Those boxes are not the whole boxes, I got many stuffs through several weeks.
If new stuffs came, I did new experiments.
This pic reminds me the painful and boring experiments.

This is the core material, 10.1" 4k LCD.
This is the only 10.1" LCD that has 4k resolution, and the board is the only board in the world by APTus.
Since April, I'd made contact with Daniel Lee, and I'd bought it as soon as it was released.

The native resolution is 3840x2160 and running at upto 60Hz.
Some color space was YCbCr 4:2:0 (300MHz, 8-bit) when I test with my PC and shield TV.
I do not know what those numbers mean..
Anyway, I should check whether it supports upto 4:4:4 600MHz, 16-bit, if I buy an UHD bluray player.

The pic shows the projection lens that I've tested for this project.
It varies from F200 to F340.

This shows the fresnel lens that i've tested.
I bought F220 fresnel lens with 0.18mm groove pitch and 0.1mm groove pitch from different four sellers from taobao.
However, 0.18 and 0.1 pitch fresnel lens have a critical issue.
Every lens from taobao shows dark regions at specific regions, and I suspect it is caused by the lens mold defects.
Though the sellers are different, each lens has same defects at the same regions.
So, I think they are identical, and it was produced by the same lens mold.
In addition, one seller advertise that the pitch is 0.1mm, but I found that it is 0.18mm pitch...
So I couldn't use any of lens from taobao.
Luckly, 0.3mm pich products are quite good enough (one from aliexpress, and the other from fresnelfactory)
Finally, I use the lens from fresnelfactory, you will have no problem with the lens from aliexpress.
I bought another F220 from optolife.com, but I haven't tested it as I am satisfied the lens from fresnelfactory.
To be honest, I don't want to do more experiments...
If you have fine-groove-pitch fresnel lens with good quality, then you must go for it.
However, there is no better fresnel lens than fresnelfactory and aliexpress in the world as far as I know.

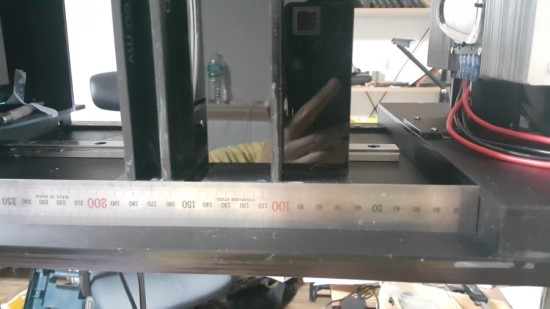
To test various lens combination, it would be better to make a test zig.
To move the lens forward and backward easily, I used linear motion guide.
You can skip this test zig part as I upload the final drawing files.

After installing three guide lines, use grease to make parts move.

Like below, the LED light engine is fixed, front/back fresnel lenses, projection lens & LCD can be placed in any position.
The LED power in the pic is 200W.

Let me explain briefly about light engine.
In short, smaller light emitting area is better, and higher power is better.
The right one is a conventional LED that is commonly used in a DIY beamer.
As shown in the pic, the emitting area is relatively large.
The center one is CBT-140 which is used to enhance the focusing capability of my 2k beamer, but the power is rated at around 100W which is not bright enough.
The left one is 200W from taobao seller, and it has quite small emitting area.
This product is temporarily out of stock, and this is not the LED that I use in this project.

I had many conversations with the seller, and he said his factory can produce 200W LED with very small emitting area.
The right one is the one that he mentioned, and the emitting area is small enough compared to CBT-140 yet 200W-rated.
The product number is SSD-90, but this is actually the modified version of SSD-90.
Anyway, China is amazing, I could buy this kind of satisfactory product from that country..

Anyway, after installing lenses and LCD and turning on the LED, you can see the following pic.
The active area of LCD must be covered by LED light, and the light should be focused on the fresnel lenses.

During experiments... you should cover the test zig with a box, or your eyes will be gone.

Ah, time to talk about condenser lens.
I tested three different condenser lenses.
The first and second ones were aspherical condenser lens in the pic.
I bought two different lenses with F50.
As F50 condenser lens is known to work well with 16:10 10.1" LCD with F140 fresnel lens.
However, I found that the 4k LCD is not fully covered by the LED light with F140 fresnel lens.
In addition to that, my F140 fresnel lens quaility is so poor.

So, I switched to the following rectangular-shaped condenser lens.
This rectangular condenser lens give brighter image compared to the above ones.
This lens is usually used in the combination of 7" LCD with F140 back fresnel lens.
If I use F220 fresnel lens, this condenser lens could be used.
But as the shape is little bit square, the focal length and light passage are not known analytically.
So? I must find the best spacing between lenses with many many experiments.
If too close to back fresnel, you will see yellowish edges.
If too far, you will see bluewish edges.
At specific points, the brightness is quite uneven....
This little devil made me stay several nights through several weeks.

Anyway, do it.
Find the best spacing.
Record, check, adjust, record, check, adjust...
It took me several weeks to find out the best spacing and best material combinations.
Anyway, if the LCD is too close to back fresnel lens, then you will see groove on the screen.
If the LCD is too far away from the front fresnel lens, then you will see poor image quality.
If closer, then you will see sharp image.
But too close? then you will see discontinous-like image due to the grooves on the front fresnel lens.
Do many experiments!
Ah, this pic shows the defects of the fresnel lenses from taobao.
See the dark region near the center and the left region?
Every lens had the same defect.
(the right dark region is shadow by the box...)
If you go for 0.3 pitch fresnel lens, you will resolve this issue.

After test is done, then design the case.
Measure the dimensions of every material that will be installed in the housing.
Do not mistake, double check.

As I can access to the laser machine in my company, I cut the arcryl by myself.
I like non-glare black arcryl.

Pikachu is in charge of controlling the LED brightness.
It is cute.
It was marked by SCAN mode.

As the arcryl is sturdy enough, you can tap it with hand-screw.
The tap will not be broken if you go for a low torque.
In the drawing files, 2.5 Pi means 3 Pi tapping points.

The OSD buttons are too short for the 5T arcryl, so I removed them and soldered longer ones.
Forgot to take a pic after soldering longer ones.

A metal knob will be placed here, and it will control the LED brightness.
As the 5T arcryl is too thick to hold a potentiometer, I glued 2T arcryl as follows.

After holding the potentiometer and installing the knob, it became fancy.

Arcryls are glued very tightly if you use chloroform.
To glue them neatly, you'd better to use a niddle.

This is the joint part of the housing, and this will hold a top cover.

Assemble temporarily the housing by taping, and glue them by chloroform.
Due to capillarity, the chloroform soak into the edges of the arcryls.

Check the dimensions by covering the top housing.

You MUST be extremely careful when you disassemble the LCD and hold it to a holder.
As we have LED light engine, we do not need backlight unit (BLU) of the LCD.
So, we must remove the BLU. And it must be done very gently.
Try to remove the black tape on the edges.

Remove slowly and gently the tapes on the every edge.
If u hurry up, then LCD will be broken.
Be extremly careful when removing the tape near the film-like part connecting LCD to the LCD circuit board.
Once it is detached, you never fix it.

Also the back side.

Slow, slow..

Disconnect the BLU cable.

The circuit board is held by double-sided tape. Use a proper tool to detach it.

Tada!

The last challenge.
The film on the light diffuser is attached on the LCD, detach it very slowly.

Done! Check the mirror like part. No cracking, then you can go further!

Assemble the LCD holder and the temporary holding zig.
Then attach double-sided tapes.

Docking LCD to the LCD holder.

Remove the temorary zig, and place A4 spacers to prevent over pressure on the LCD by the top LCD holder.

Assemble the bottom LCD holder and the top LCD holder.
DO NOT tighten them much, you will break the LCD.
How do I know it? Casue I broke it and bought another LCD !!!!

You can attach the fresnel lenses easily.
Assemble the bottom holder and the guide zig.

Double-sided taping.

Attach!

Done.

The next step is to attach LED onto the heatpipe.
Mark the points in where the LED and the condenser lens holder will be held by bolts.

Make marks(?) on the aluminium block by the following marking tool(?).
(Do not know correct terms, please let me know)

Then you will see the marks, this will be drilling guides.
Without these kinds of marks, it is difficult to drill at specific points.

Check whether the marks are in place.

To make holes, disassemble the aluminium blocks.

And remove cheap-looking thermal grease.

Make holes with a drill stand.
As I will make M3 taps, drill it with 2.5Pi drilling tool.

Luckly, every hole is in the right position.

Tap M3 screw holes.

Paste a better thermal grease.

Attach the LED and the condenser lens holder.

If you install the condeser lens, it will look like this.

The transparent arcryl above will be replaced by the following black arcryl.
Glue them by Chloroform.

Black is way better.

This zig will hold the fresnel lenses and the LCD.

On the sides of the above zig, 4020 cooling fans (x8) are attached.
To prevent heat damages on the LCD, the LCD should be cooled down all the time.

Legs are made 8Pi headless bolts, and they were took from my 2nd FHD beamer.

To adjust the height and leveling, the following part is used.
To prevent a slip, 2T viton sheet was used.

They are glued together.

Once they are installed, it will look like this.

The LED and the cooling fans (+LCD) are controlled separately.
So, I can over cool down the heatpipe.
You can make a circuit to do it automatically, but not my field.

To make Pikachu and Red, color the arcryl parts.
My coworker helped me a lot.

Make it flat, not shinny.

6 colors are needed.

Start....

Red is done in around two hours..

Pikachu took me another two hours.

Attach cooling fans for heapipe.

To prevent dust incoming, install dust filter.

Attach other necessary materials.
The LCD on the right hand side monitors LED conditions.
You can buy it toghether when buying the LED.

Some parts were took in the pic.

Another view.

This little SMPS feeds the cooling fans and the LCD driver.

HDMI ports.
I made a mistake on the OSD button, there's one more hole.

Cute pikachu and cooling fan to feed fresh air from outside.

Start wiring.
Make connections slowly, and make them neat.

Looks fairly neat?

After wiring, check all the cooling fans and the LED.

The blue LCD monitors the LED brightness, temperature, and running time.
It will cut off the LED power when it reaches 80 degree C.

Oh my eyes, so bright.

Shows the air flow concept in the pic.
The key point is that fresh air must be fed all the time.

White and blue colored switches.

This is the inverter to drive BLU.
This part is not necessary, so cut it out.

Installed everything except the LCD.

This is the top cover housing.
There are windows to feed fresh air.

Dust must not go into the housing.
Use dust filter.

It is convenient to hold the dust filter by this kind of door patches.

Like this.

You will never know the inside.
The outer part is fancy now.

To hide bolt hoes, use black stickers.

Cover every hole.

After few weeks.... my room became chaos.

Whew... let me clean up!

The final results come.

So cute...

Neat switches.

Most ugly part is the front.

The other side.

Pikachu will manage the LED brightness..haha

Gorgeous HDMI ports :)

By the way, to bypass HDCP 2.2 compliant, I bought HDFury integral.
Though it is rather over priced, I can access this little dude via my cell phone.
If I do not use this, shield tv runs at 1080p@60Hz.
If I use this, iti runs at 2160p@60Hz!

To enjoy Netflix in 4k resolution, I bought Shield TV.

Installed on my desk.

To show the image quality exactly, I opened a PDF file, and took pictures at different points.
Left top corner.

Left bottom corner.

Center.

Right top corner. (the beamer was not in right place during test)

Right bottom corner.

Center top.

Center bottom.
In short, the image quality is very very nice.
Nobody made this results upto now except me hahah.

Show off time

Am I in a museum?

Birds look alive!

Color is very satisfactory. (and I can adjust brightness, contrast, gamma, etc.. by the LCD board)

Nice.

Good.

But, as I mentioned, the brightness is the weak point.
With ambient light, it is hard to see the image.

BUT, it is super satisfactory for me under the dark environment.


Shows it runs at 2160p@60Hz.
Ignore "HDCP Disabled". Integral solved the issue.

Turned on shield TV.

I can watch Breaking Bad in 4k resolution!!

See "Ulstra HD 4K" !

I haven't watched Narcos, I will watch it soon!

Is House of Cards good?

Though my cell phone camera sucks, I tried to take videos.
Just look at them.
This is the test of google movie.
Though this resolution is HD, I took thie video as I am the fan of X-men series.
I should buy a UHD bluray player, then enjoy it in 4k resolution.
Finished!
I feel I am gonna stick to Netflix for a while.
I should go grab a UHD bluray player soon.
The pic shows.. my 2nd FHD beamer (left) and my 3rd 2k beamer (right).
Say good bye to them! AND welcome my new 4k beamer!

Acknowledgement
- 4k 프로젝터에 제작에 생각외로 많은 금액이 들어갔는데 저에게 팔 수 있는 중고품들을 기부해주신 최담담님께 감사를 전합니다 ㅎㅎ
- 회사 업무가 끝나고도 같이 실험실에서 도색을 도와준 최강영님께 감사의 뜻을 전합니다..! 치킨 한마리 더 사드리겠습니다..ㅋㅋ
- 회사에 있는 레이저 장비를 사용 허가를 해주신 스탠다드에너지 일동에게 감사의 뜻을 전합니다.
- Thx to Ryan Smit for sharing your knowledge abt a diy beamer, optics and fresh ideas.
- Thx to Jthedd for sharing some key material sources.
- 저를 응원해준 모든 친구들에게 감사합니다.
If you are willing to donate to me, please click the following button.
Donation fee will be used for my DIY projects.
Fantastic build and write up.
ReplyDeleteThank you!
Thx so much!
DeleteHi! Did you use 200w led packed to ssd-90 or 150w? Your CC led driver 12v input voltage so you ned to use 12v power supply befor CC driver?
DeleteHi! Is it 150 or 200w led used?
DeleteI used 200W LED, and power supply is required to drive CC driver.
DeleteThis is amazing, I cannot wait to build it.. Creative, efficient design.
ReplyDeleteHave you ever given any thought into making a 120Hz+ projector? I want to try gaming on a projector, but the move down from 144Hz to 60Hz is painful.
I couldn't find any vendors that provide high refresh rate lcd panels or monitors anywhere near 10", so I can't use your design. Is there a way to create a 120Hz+ lcd projector without using a large lcd panel?
Thx.
DeleteI think it is impossible until some vendors will produce 120Hz+ version of LCDs.
Amazing DIY, I am working on this project and ordered all hardware.
ReplyDeleteI have one confusion where I will get holder and temporary holding zig for LCD and Fresnel lens?
Also thickness of Arcryl is 5T ?
Thanks in Advance!
Ah, I forgot to upload zigs drawing files!!
DeleteI will upload it asap.
I've updated my drawing files.
DeleteDear sir, this is a fantastic build, How much in total did this set you back in USD or EU?
ReplyDeleteI will do the math later, but I think the total cost will be around 1000 USD.
DeleteThank you
DeleteIs it $1000 with the Intergral and Shield TV?
DeleteNo, separate
DeleteNice to see creativity at its best.
ReplyDeleteThanks for also putting these efforts in your blog.
Congratulations (!)
Thx very much!
Deletehii do i need to buy 4k display and control board both
ReplyDeleteYes.
DeleteHello! Is it $250 for both display and control board that you paid?
DeleteNow, it must be around 300$ or so.
DeleteHi can you give us the details of motion rail. where you bought it etc....
ReplyDeleteSearching keyword is "linear motion guide". I borrowed it from my company.
DeleteHey my friend! Amazing results! Congrats! What is the max throw distance/screen diagonal? And is the focus on the lenses adjustable?
ReplyDeleteI have no idea of maximum throwing distance. My current setting is around 3 meters. The focus is adjustable. Thx.
DeleteI wonder what it would be like if you do side by side comparison of your DIY 4K projector and commercial Home Theatre 4K projector? Just out of curiousity. I would if I were you.
DeleteI have no commercial 4k projector. It is toooo expensive for me.
DeleteHi,
ReplyDeletevery nice project and well realized. thanks for sharing it. I would be intrested to do the same to change my fullhd projectors. In fact I use two projectors for passive 3d. Do you think your setup output 2000 lumens? if not do you have any idea how to improve this? xenon bulb?
Impossible to get such high lumens. No idea yet.
DeleteHi , can you upload a hand drawing of the power supply and its wiring .
ReplyDeleteHi
ReplyDeleteCan you help with wiring diagram of the 2 smps with single AC source .
Hi Cho, great work. Have you considered using two LCD panels, one in front of the other, for mega contrast? Like Panasonic, Brightside, etc.
ReplyDeleteI did this with TopFoison 2.5k panels and it works. You just need to adjust Gamma to max otherwise it will be too dark.
I'm OK with 2.5K instead of 4K but the problem with 2.5K is that it won't accept 4K input, only 1080p, so if you want to watch UHD Bluray you have to downscale to 1080p from HDFury Linker which defeats the purpose of 2.5k instead of 1080p panels. So now I think your approach with native 4K LCDs is the best, no downscaling needed.
Due to transmissivity losses from each panel you will probably need even higher lumens LED light source, and there are other problems too like seeing rainbows. I believe it might be best to use a greyscale "back panel" prior to the front panel. It can be lower resolution but the idea is just to increase the contrast for HDR. Also the effective bit depth should be improved over 8-bit, so no or less banding artifacts.
http://www.avsforum.com/forum/24-digital-hi-end-projectors-3-000-usd-msrp/1528424-let-s-push-2-chip-consumer-dlp-happen-2.html
That seems really cool, but I do not care about high contrast at this moment. The controller provides so many functionality, so I get satisfactory contrast ratio. However, your idea is definetely cool as an alternative of HDR.
Delete